Next step in the midification process is to add the PCF8574 chips. These chips let me add multiple inputs using only three of the input lines on the Arduino. The chips can be daisy-chained together using the same three input lines so with two chips I can have sixteen inputs and still have loads in inputs/outputs available on the arduino for other interesting stuff.
Checking the data sheet for the chip I noticed that the i/o lines on the chip have a built in pullup resistor. This means that if the input line is not connected it will be at the high voltage. To close a switch the input line it needs to be connected to the ground line.
In my previous, single switch, set up I had used a pulldown resistor meaning that an open input was at zero volts and needed five volts to be a closed input.
The diagram below shows a pullup resistor in place.
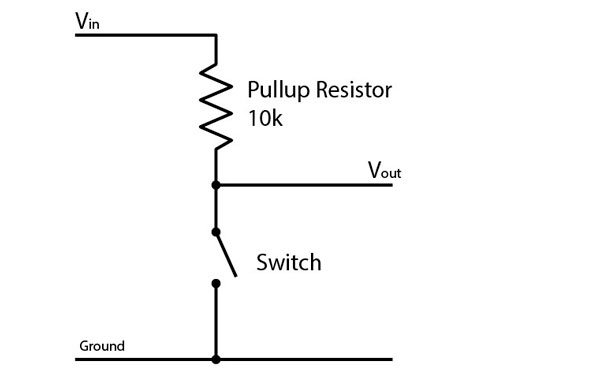
With the switch open Vout will be high. When the switch is closed it goes low.
For consistency I have changed the circuit and code on the single switch project to use a pullup resistor.
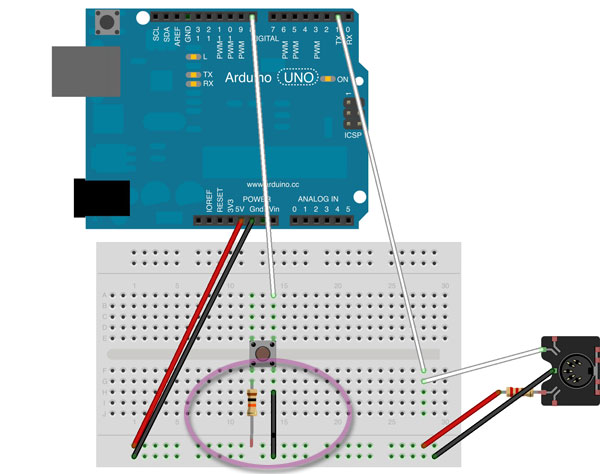
This has been simply a case of swapping the resistor and the wire.
The code is modified very slightly as well changing the line
if (keyispressed == HIGH){ //the key on the board is pressed
to
if (keyispressed == LOW){ //the key on the board is pressed
//Driving MIDI using a single button
// Rob Ives 2012
// This code is released into the Public Domain.

#include

#define KEY 8
#define LED 13

int keyispressed = 0; //Variable. Is the key currently pressed?
int noteisplaying = 0; //Variable. Is the Note currently playing?

void  setup() //The Setup Loop
{
  pinMode(LED, OUTPUT);  //Set pin 13 , the led, to output
  pinMode(KEY, INPUT);  //Set pin 8 to input to detect the key press
  MIDI.begin(); //initialise midi library
}
//---------------------------------------------
void loop() //the main loop
{
  keyispressed = digitalRead(KEY); //read pin 8

  if (keyispressed == LOW){ //the key on the board is pressed
    digitalWrite(LED, HIGH); //set the LED to on.
    if(!noteisplaying){ //if the note is not already playing send MIDI instruction to start
       MIDI.sendNoteOn(36,127,1);  // Send a Note (pitch 36 (C2), vel.127  ch. 1)
       noteisplaying = 1; // set the note playing flag to TRUE
    }
  }
  else{
    digitalWrite(LED,LOW); // the key is not pressed. Turn off the LED
    if(noteisplaying){ //if the note is currently playing, turn it off
      MIDI.sendNoteOff(36,0,1);   // Stop the note
      noteisplaying = 0; // clear the note is playing flag
    }
  }
}
The good news is that it still works. Time for more inputs